


Listen. If you're just starting out with Git, you probably already know just how confusing it can be. Diving into the wide world of version control is a far cry from just hitting Ctrl + S and closing your laptop. What is a "commit"? Is that different from uploading a file? This short blog is here to help alleviate some of that confusion.
This blog won't cover creating a GitHub account, installing Git on your computer, installing GitHub Desktop, or the process of cloning a repository, but know that those are things you should probably do before getting into it.
The Gi(s)t
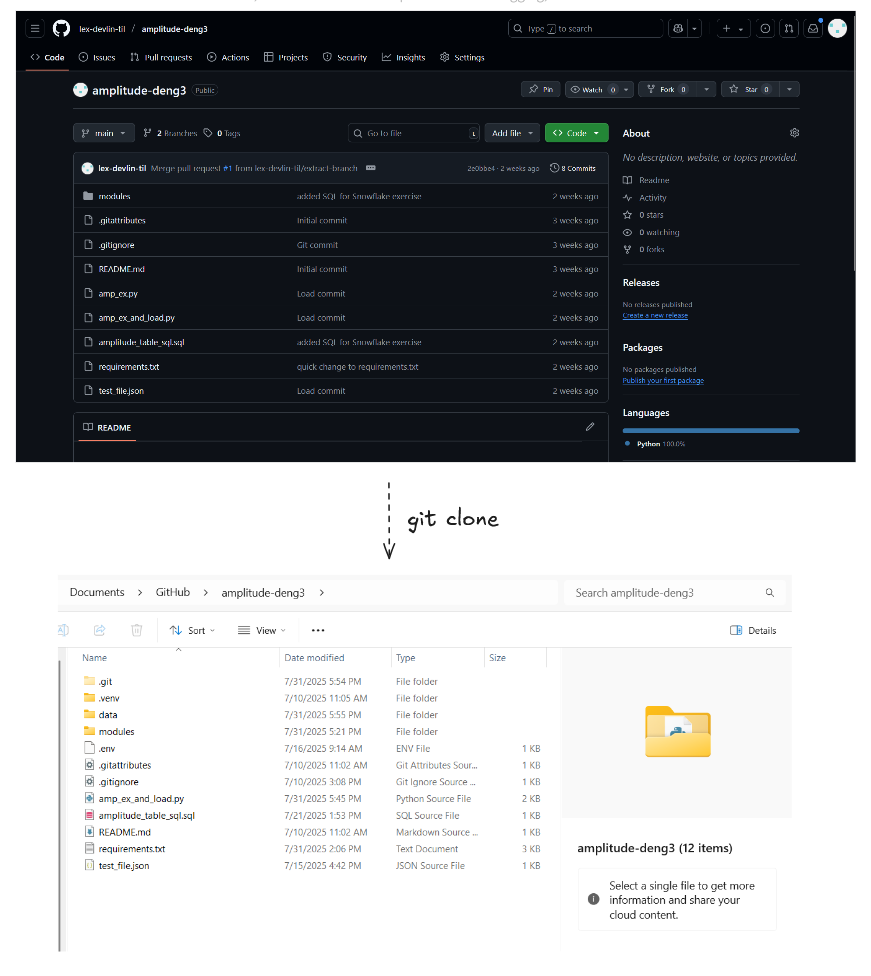
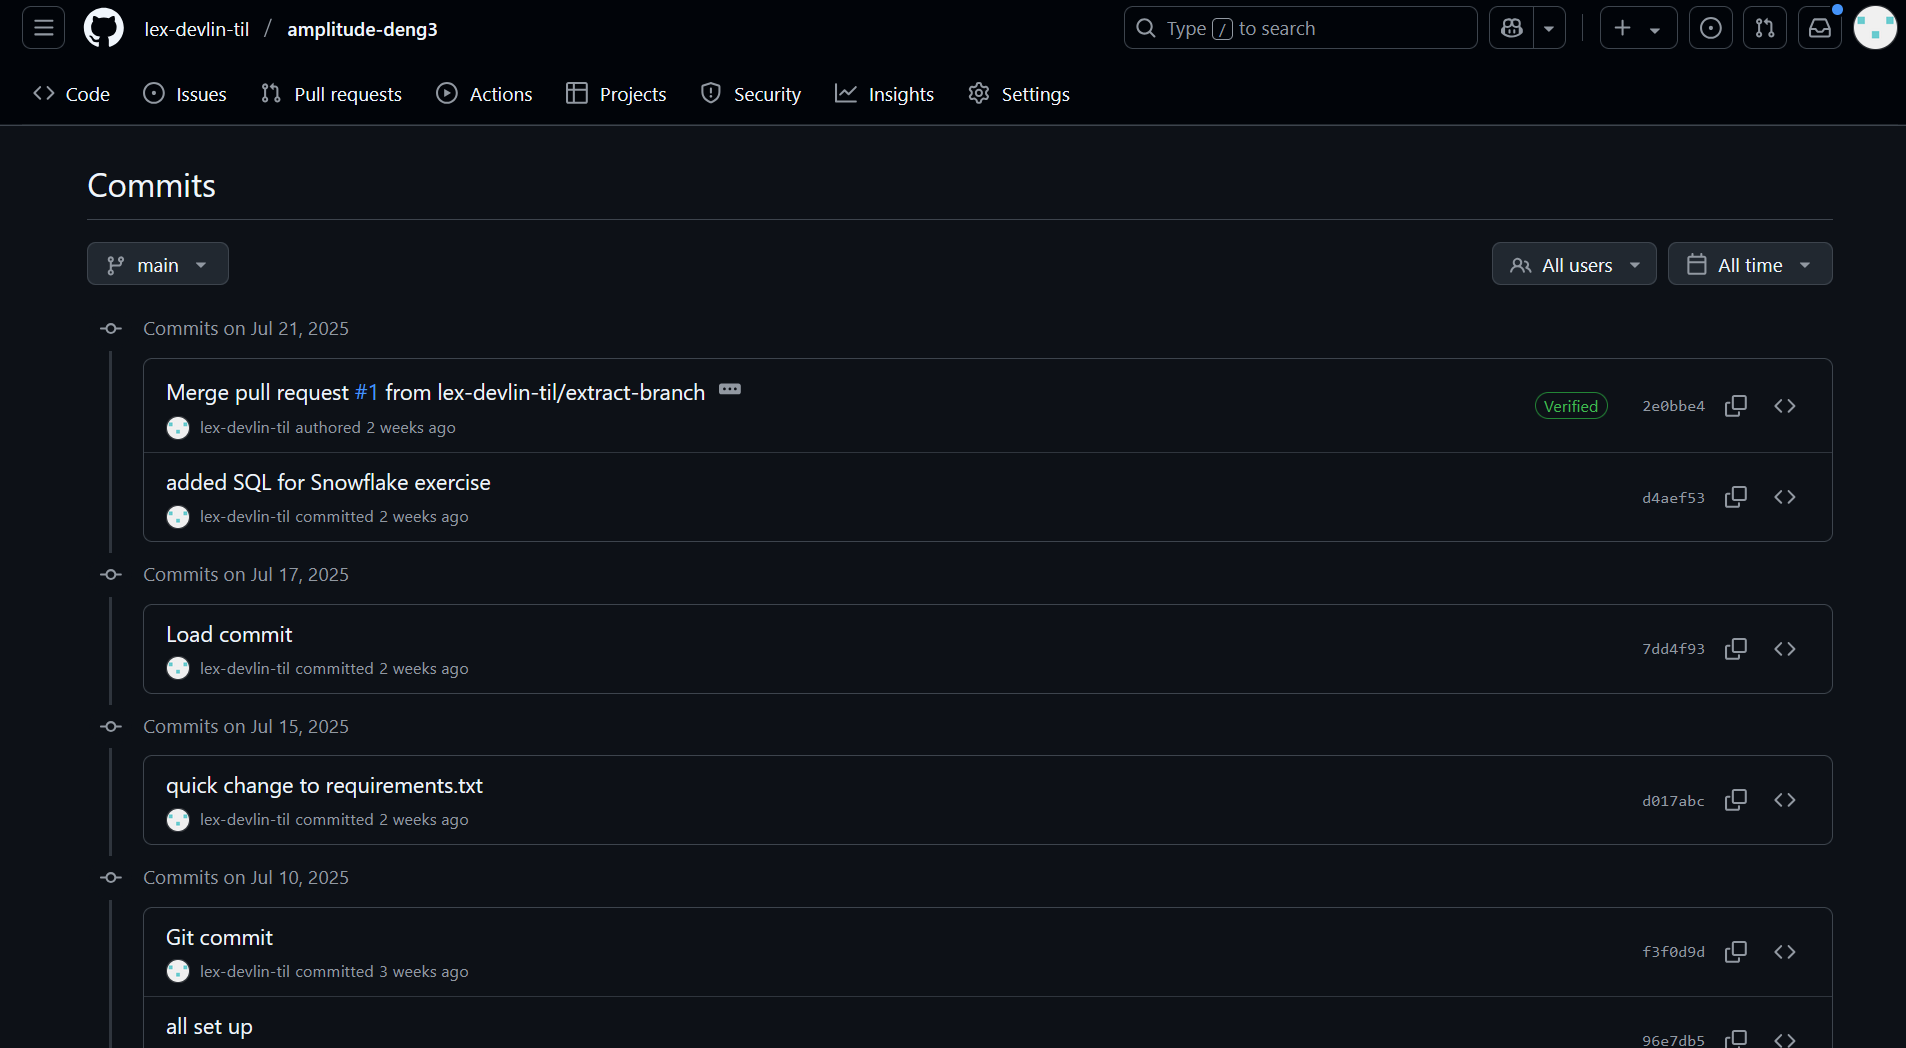
Generally, you'll have one GitHub repository per project. For example, I have a GitHub repo called "amplitude-deng3" built for work I've done with amplitude data.
Branches
The general idea is that you first start a "branch," which is basically a different timeline. Imagine your repo like a multiverse, filled with different possible timelines. The "main" branch is the "real" one.
I needed to create some scripts specifically relating to extracting data, so I created a new branch called "extract-branch". You can be more creative with your branch names should you desire. If I needed to create some scripts related to loading data I might make a "load-branch". I could, if I wanted to, make changes within extract-branch and load-branch independently without affecting one another.
Saving
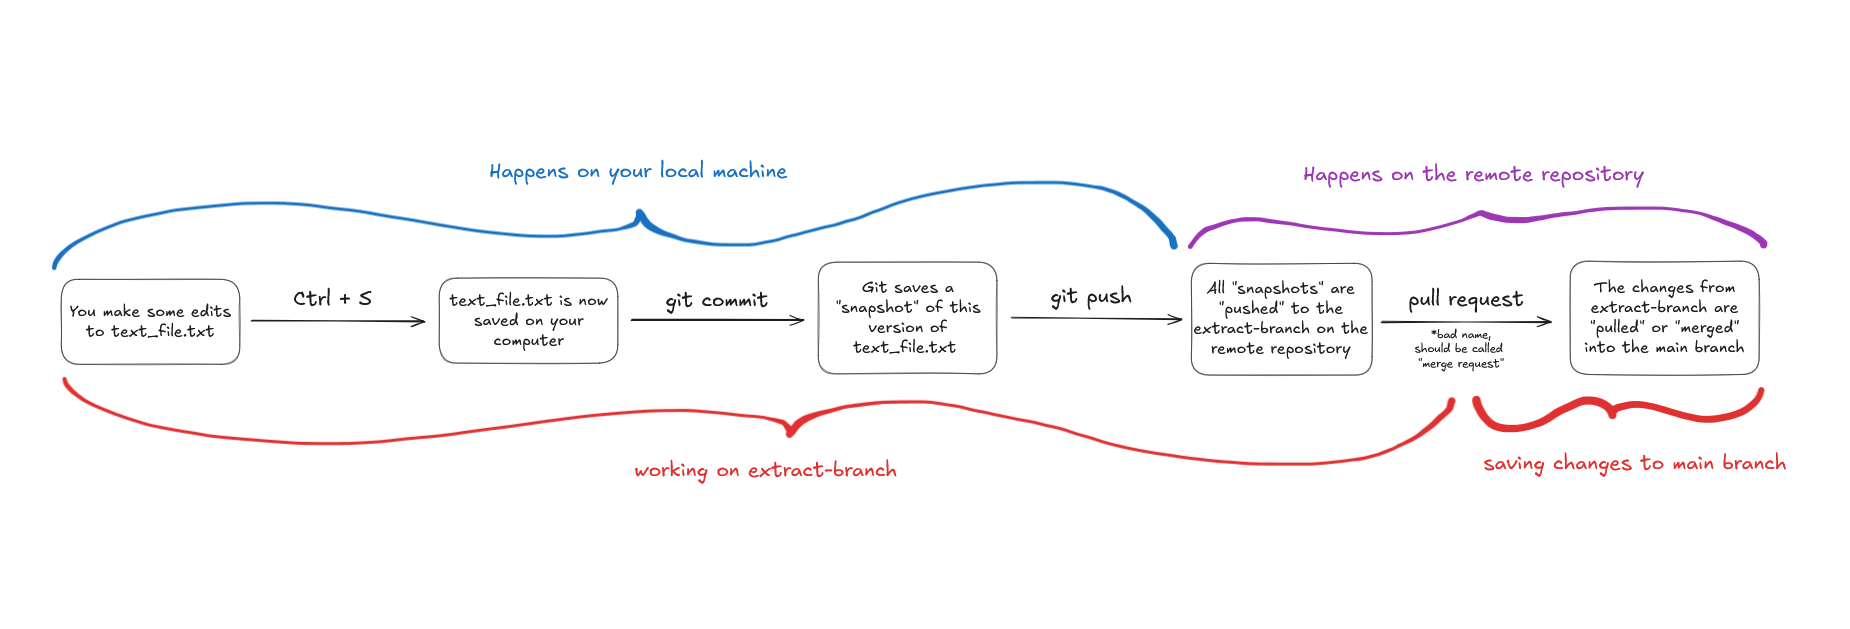
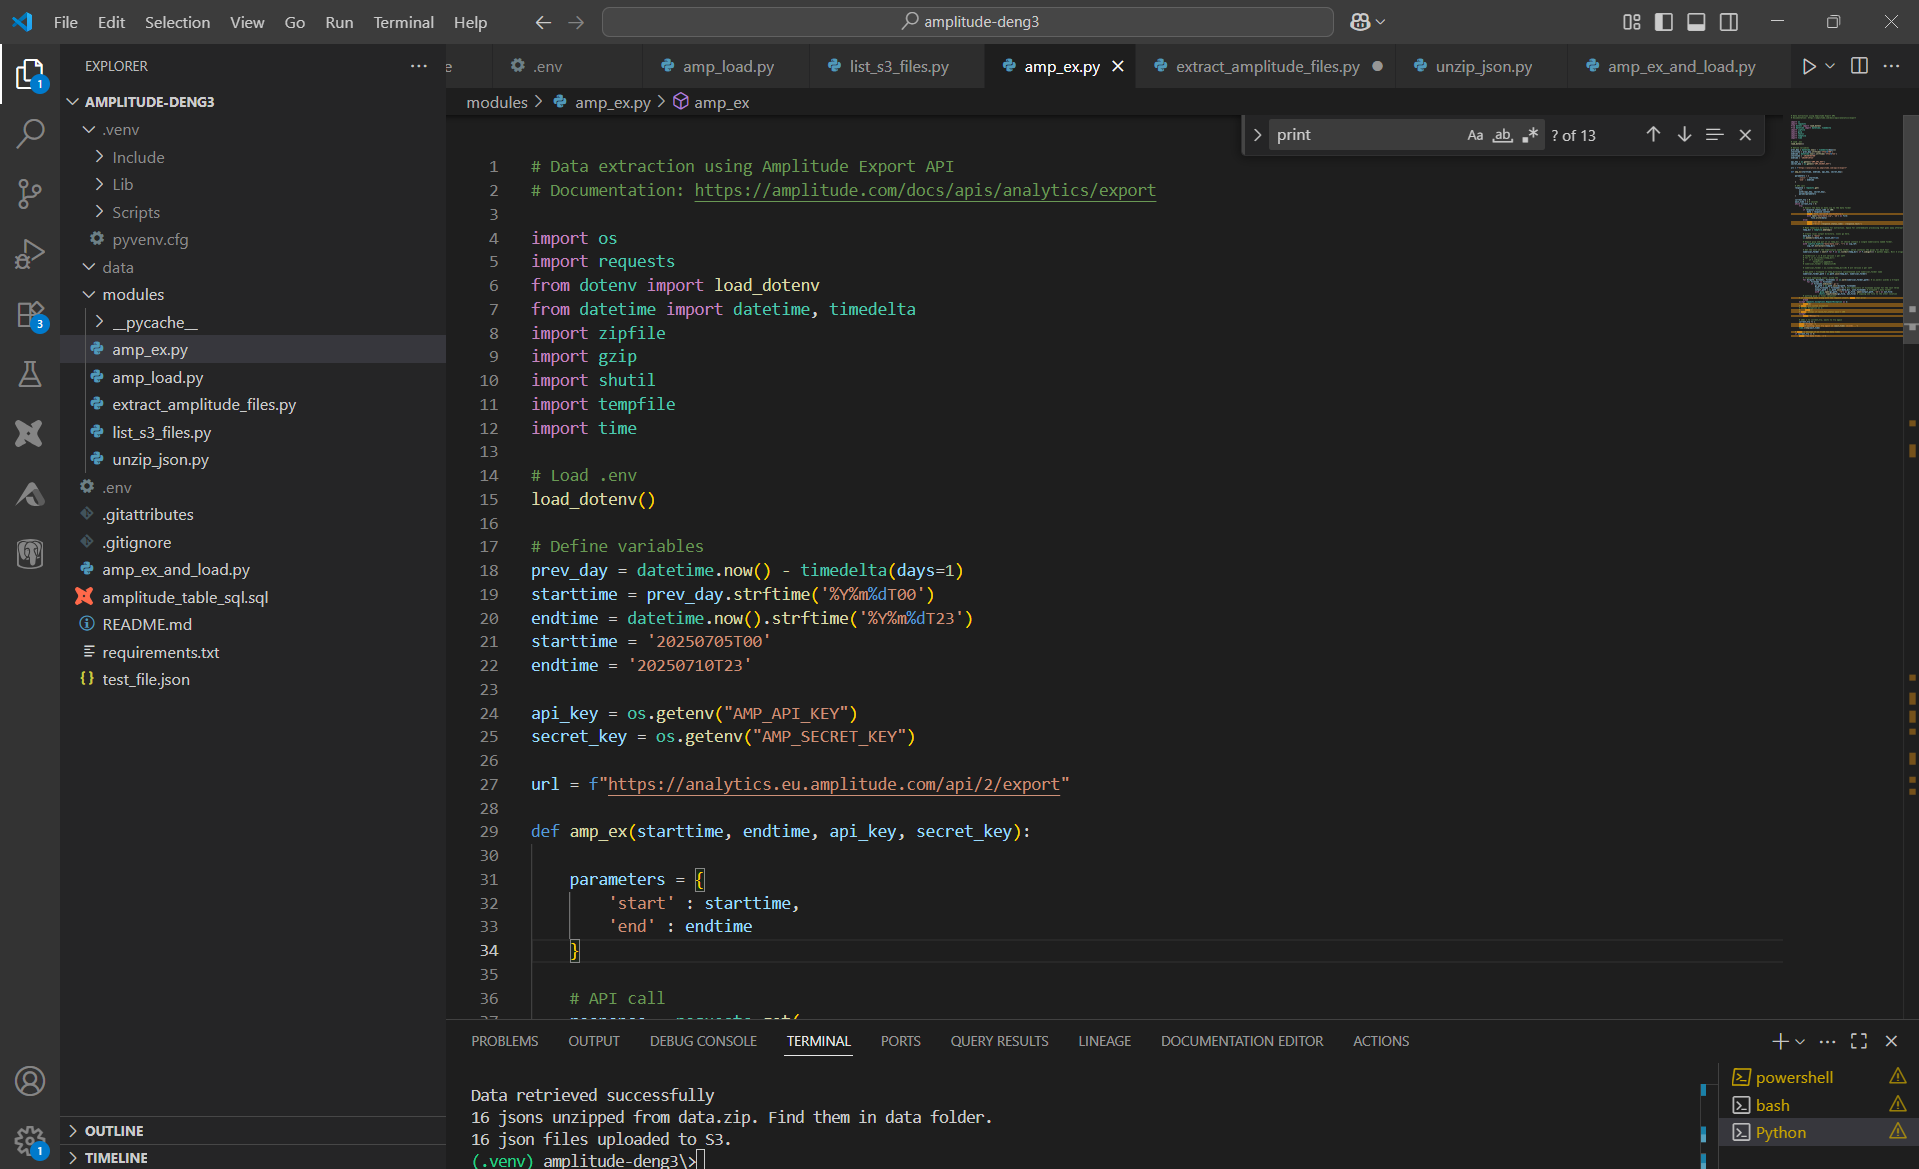
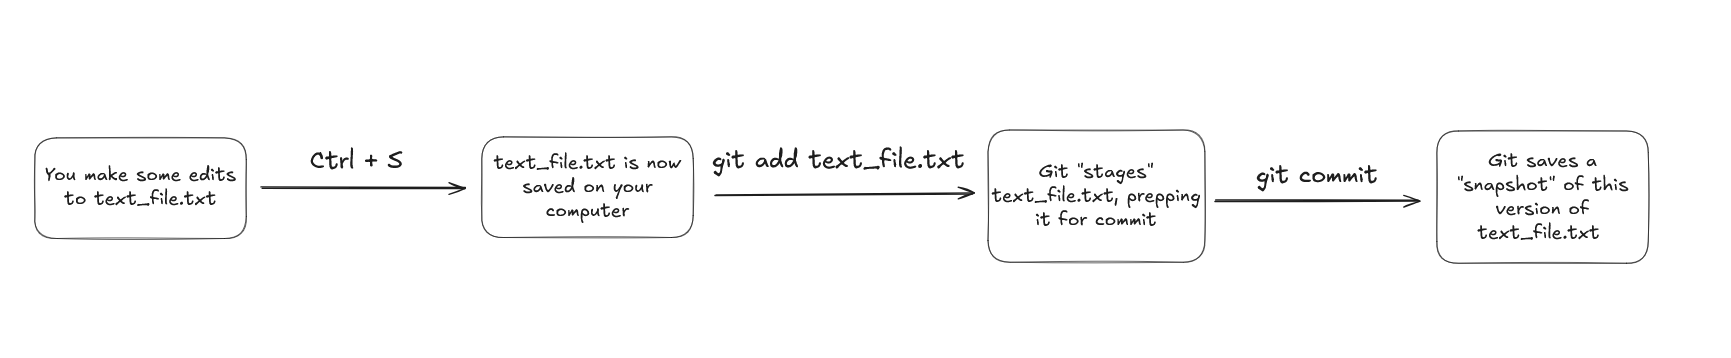
When I save with Ctrl + S, the changes to this script get saved on my computer normally. Where are they getting saved to? The "local repository" - i.e. the clone of the remote repository!
I said I wouldn't describe the process of cloning a repository, but here's what it means to do that: a cloned repo is just a local working copy of the remote repo. The remote repo is what we call the online version, which is considered "final" and gets shared with the world.
The goal is to save our changes on our local machine first, then once we're sure all the changes are doing exactly what we want, we then "push" them (i.e. upload them) to the remote repo.
Committing
all your changes saved, it's time to commit those changes. A commit is like doing a bigger Ctrl + S for all the files you've saved. It tells Git to take a snapshot of all your files exactly as they are at that moment. Theoretically if something went horribly wrong - say you accidentally deleted a bunch of files, or, god forbid, committed your API keys - you can restore your repo to any of the commits you made in the past.
Committing won't add extra files of various versions to your repo - thankfully, Git is really smart and handles that for you. All you'll be able to see are your files as you saved them. The past committed versions of these files are in there, but Git has cleverly encrypted/hashed them to oblivion such that they would only become usable if you rolled back to a previous commit.
Pushing
So, we've got a timeline of commits on extract-branch. That's great - but that whole timeline still only exists on my laptop. If I chucked my laptop into a lake at this point, all these changes would vanish. That's what pushing is for - making sure our changes are saved online/remotely.
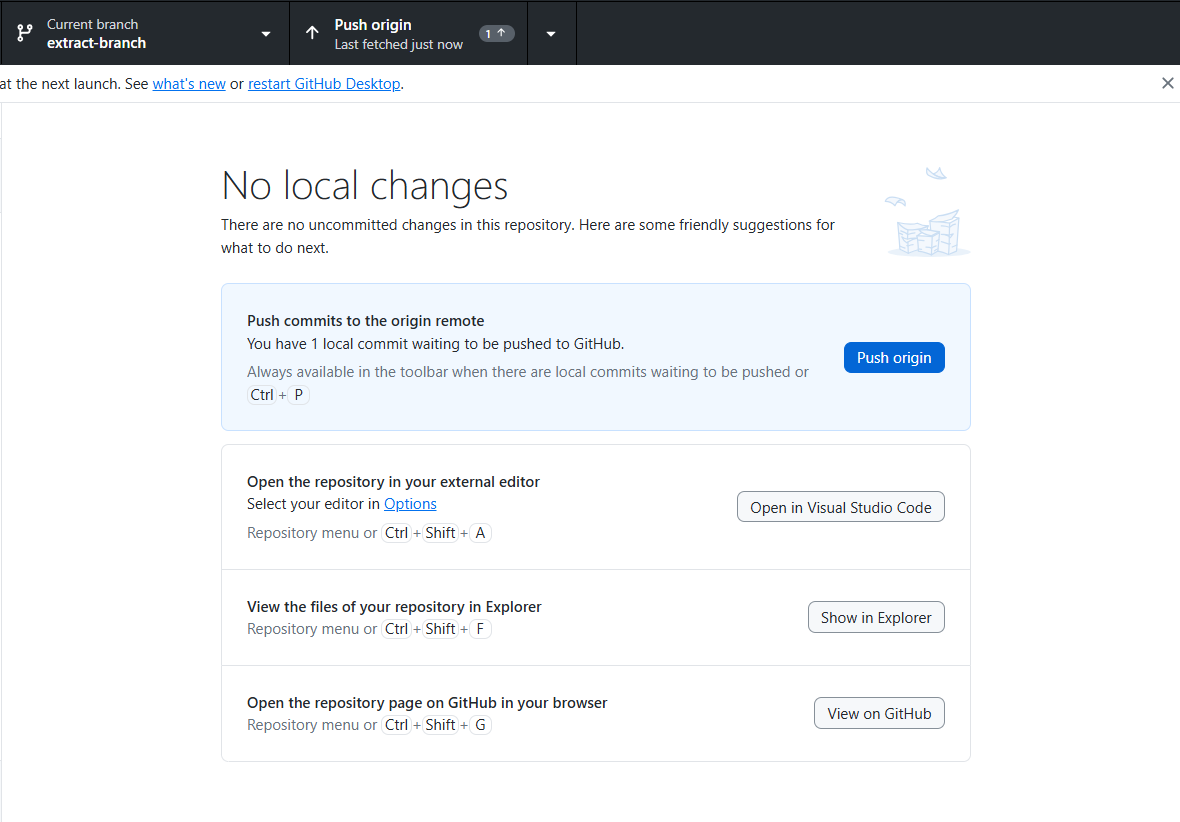
Pushing saves that whole timeline from the local repo to the remote repo.
Staging - a note
If you use GitHub Desktop, you don't have to think about staging. GitHub Desktop handles staging for you, somewhat invisibly. If you're writing git commands in the terminal manually however (which is flashy and helps you stay specific), you can't only write the command to commit. First you have to stage the files you want to commit. This puts them in an invisible database that only git can see. Git then commits whatever has been staged there.
The order of what you'd write in the terminal would be as follows:
git add .
git commit -m 'Commit message. I made several changes to my code. etc.
git push origin extract-branch
With changes saved, committed and pushed to the branch on our our remote repo, there's just one last step.
Pulling/Merging
Just as you can have any number of commits per push, you can have any number of pushes per pull request.
So, this is called making a "pull request". This is a really bad name for it. It should really be called a "merge request."
To explain why it's called pull request: this whole time we've been naming things from the perspective of the person who is making the changes, saving them, and pushing them away from our local machine onto the remote repository. Suddenly, we switch perspectives.
A "pull request" takes the perspective of someone who is standing in the remote repository's main branch. They see that changes have been made to extract-branch, and make a request to "pull" those changes from extract-branch into the main branch... yeah. It'd be better to just call it "merging."
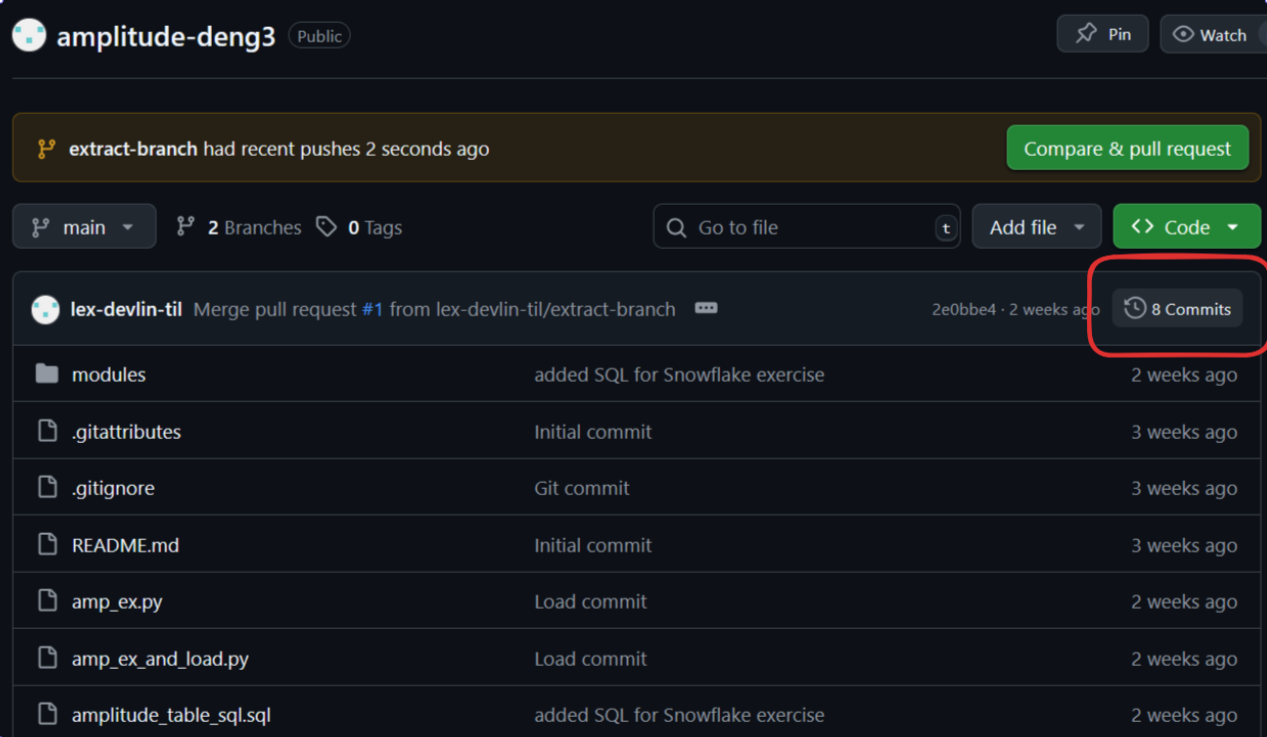
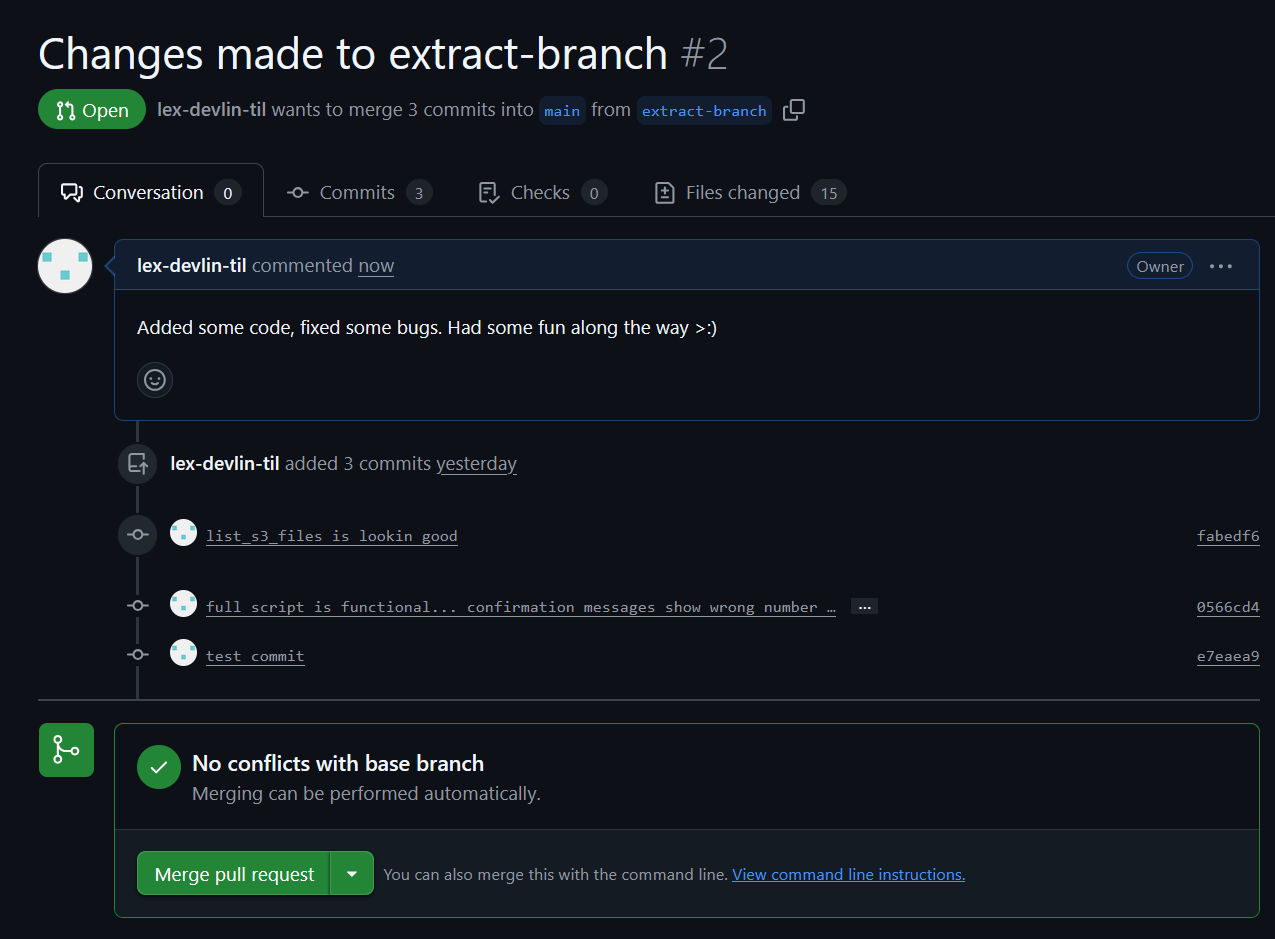
Semantics aside, you do this by navigating to your GitHub remote repo through a browser. If you've pushed your changes correctly, you should see that there were changes pushed to that branch. A redundant sentence, yes, but it's there to point out that if you don't see this here, you likely didn't push in the way you thought you did.

Click that big green button.
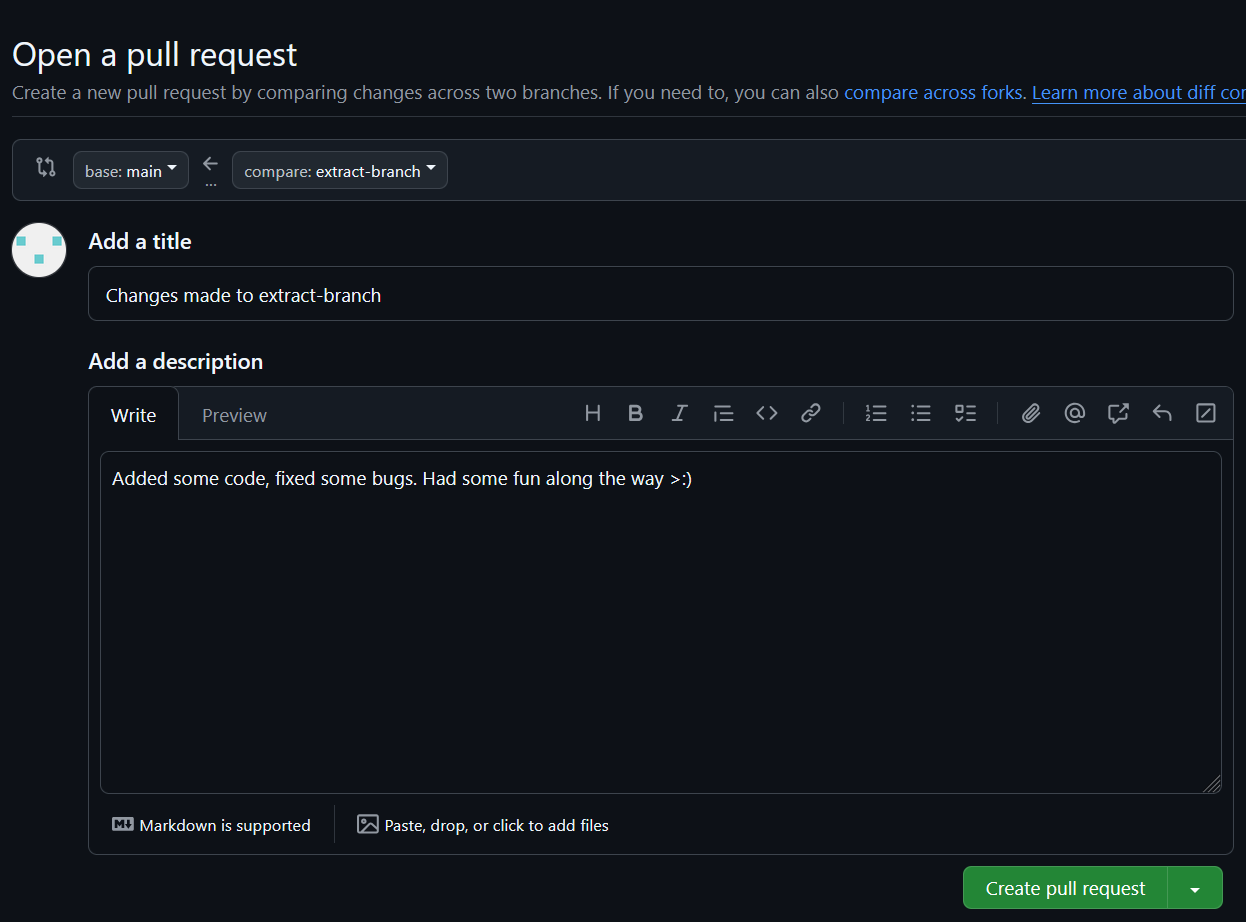
Write some words, then click that big green button again.
Once more, green button.
That'll be it. All your changes will be a part of your main branch now, easily sharable with the world. To be clear, anything you push is also shared with the world, because it becomes part of the remote repository. But the main branch is what people see first, and usually you don't want to make people go navigate to some other branch.
On collaboration and conflict merging
One of the biggest draws of using GitHub is that it makes it possible for multiple people to work on the same project simultaneously. Multiple people can even work on the same branch! If there are ever conflicts in the code however, those have to get handled before things get merged into the main branch.
The standard for how these conflicts get handled is usually a face-to-face meeting. Put on that zoom shirt! This blog won't cover the specifics of handling merge conflicts, but just know this is a big part of the process. If you're a one-person team however, you should now know everything you need to know to work with Git for personal projects.