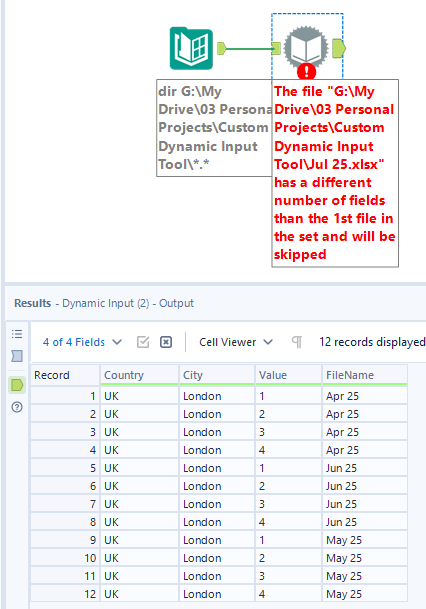
If you’ve ever used the Dynamic Input tool in Alteryx, you might have run into this: "The schema of the input files is different.”
Even when… it’s clearly not.
You double-check the files- same number of columns, same names, same data types- yet Alteryx refuses to load them all in one go.
In this post, I’ll show you why it happens and a super simple fix: build your own Dynamic Input macro using just four tools.
Why this happens
Alteryx’s built-in Dynamic Input tool is picky. Even tiny invisible differences, like whitespace in a field name, capitalization (“CustomerID” vs “customerID”), or metadata ordering, can trigger the schema mismatch error.
Sometimes, even files that look identical can differ ever so slightly at a metadata level.
Instead of fighting it, we can bypass it completely with a custom macro.
My setup
I have 4 files: Apr 25 -> Jul 25. All have the same data structure, but Jul 25 has an extra column. When trying to combine them in Alteryx, I get an error of Jul 25 being skipped because the schema doesn’t match as their is an extra column.
To fix this, we can build a macro that dynamically handles different file structures.
The solution: Build your own Dynamic Input macro
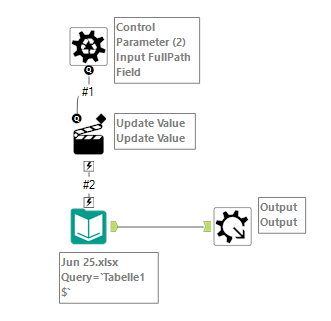
You only need four tools:
- Control Parameter: to pass in the file name
- Action Tool: to update the file path in your Input tool
- Input Data Tool: where the data is actually read in
- Macro Output Tool: to send the results back out
Step-by-step: Creating the macro
In a new workflow:
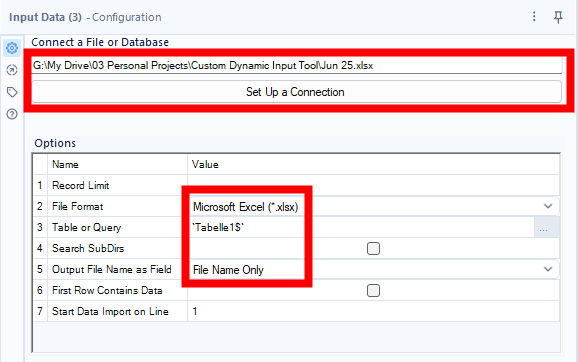
1. Add an Input Data Tool
Pick one of your files as the template so Alteryx knows what structure to expect. Make sure you add a Table or Query and Select File Name Only to make it easy to see which row belong to which file.
2. Add a Control Parameter
This is what will take each file name from your workflow. Under 'Enter a label for the Control Parameter:' Call it something like 'Insert FullPath'
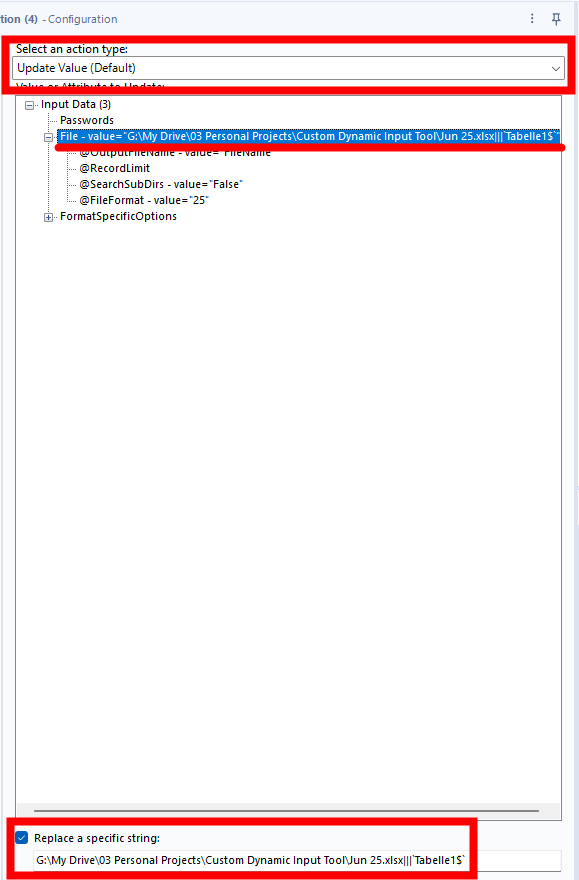
3. Connect it to an Action Tool
Set the Action tool to update the Input Data tool’s file path. That way, each file path coming in gets dynamically loaded.
4. Add a Macro Output Tool
This sends your final data back to the main workflow.
5. Update the Interface Designer
Open the Interface Designer for the macro and update it as following:
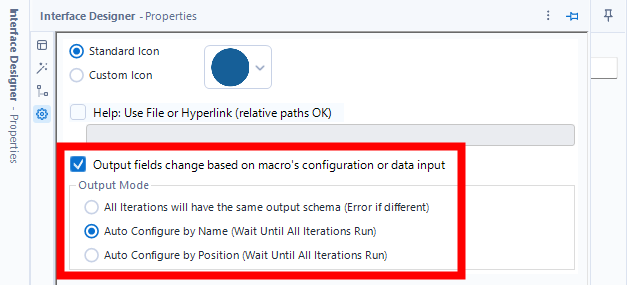
Finally, save the macro as a .yxmc
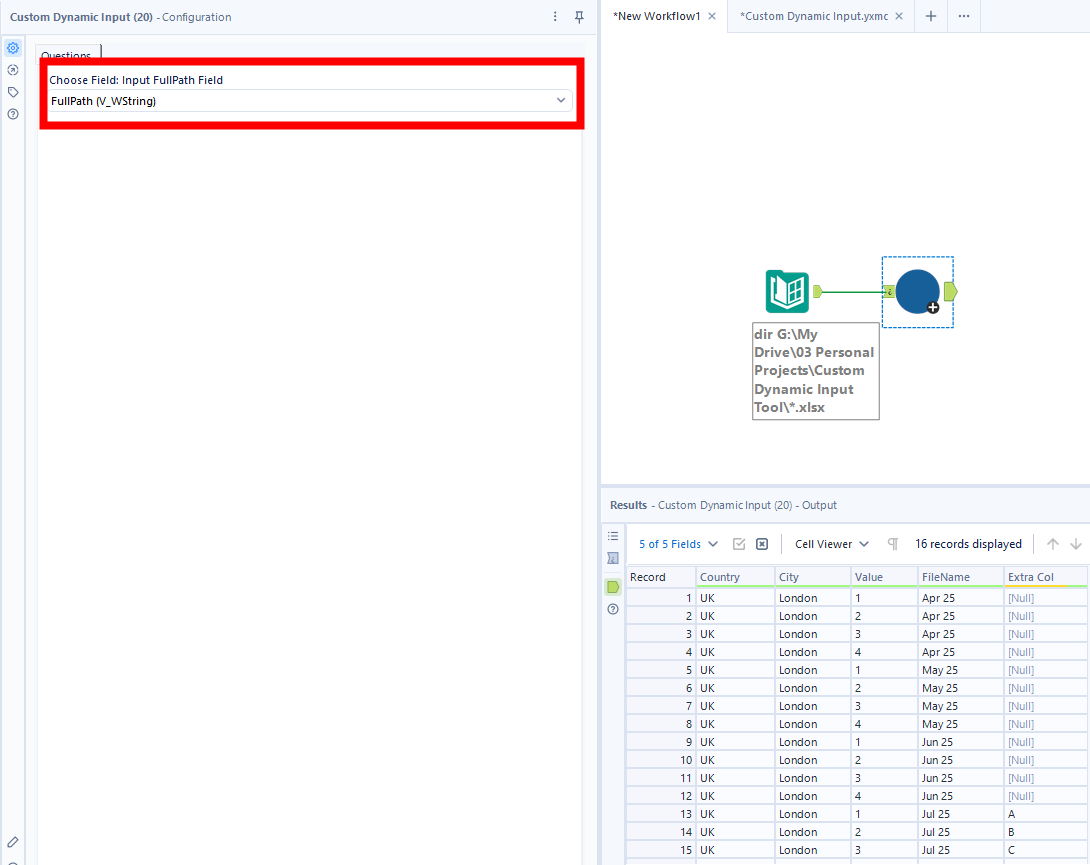
Using the macro in your main flow
Once you’ve built and saved your macro, and added it to your main workflow, chose the FullPath field from the Directory tool.
Let it run — no more schema mismatch errors!